


How To Quickly Add and Name Hotspots With The Default Name Feature

How To Quickly Add and Name Hotspots With The Default Name Feature
Welcome to the Cloudpano 360 Virtual Tour software blog!
Today, we are excited to announce a new feature that has been requested by our users: the ability to quickly name scenes when adding hotspots in the tour editor.
At Cloudpano, we care most about our users, which is why we are constantly working to improve and update our platform. Our 360 virtual tour software is the number one and most amazing platform you will find, and we are always looking for ways to make it even better.
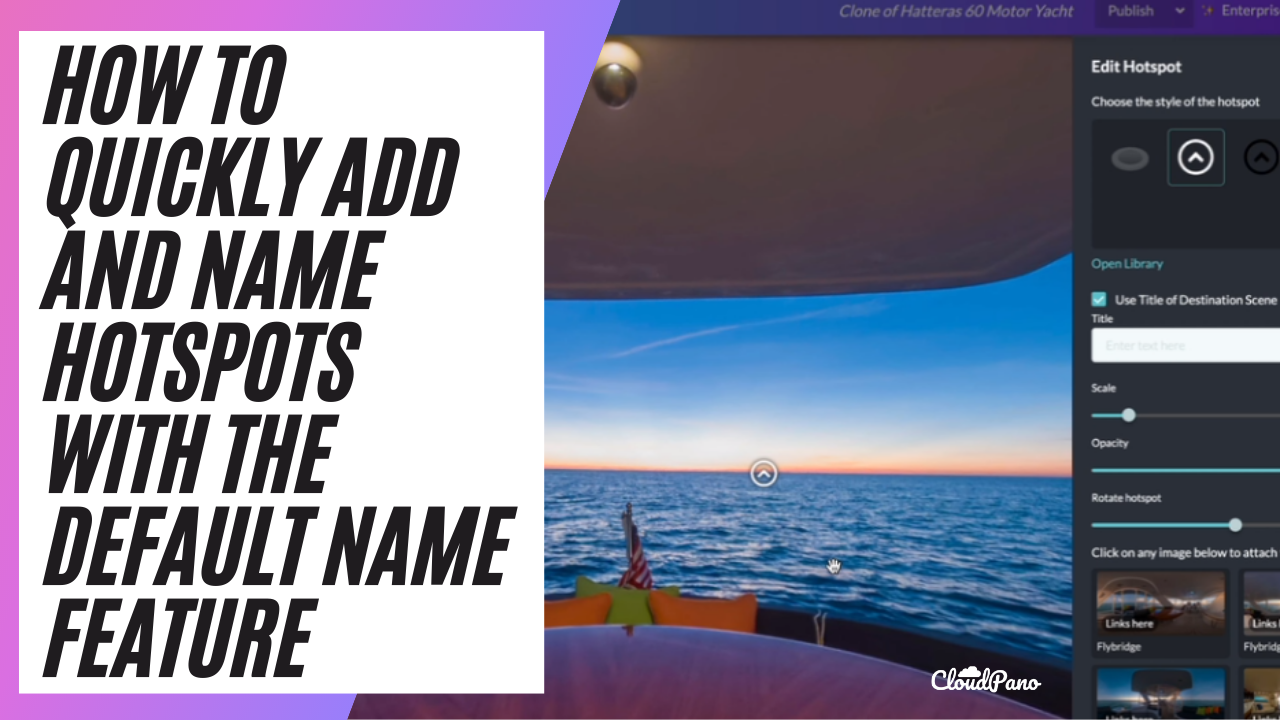
One way we are doing this is by allowing users to easily name their scenes when adding hotspots in the tour editor. Simply click on the hotspot you want to add, and you will see a default checkbox that says “use title destination scene.” When you click “save hotspot,” the title of the scene above the scene will be named based on the image or room name, which is also imported by the file name.
This feature is extremely convenient for those who want to move quickly through the tour editor. For example, if you have a room already named “hallway,” you don’t have to rename it every time you add a hotspot. This feature will help you move faster and create amazing 360 3D virtual tours more efficiently.
And of course, if you want to override the default name, you can simply click on the field and enter a new name. For example, you could rename the scene “room” by clicking on the field and typing in the new name.
We hope this feature helps you on your journey to create stunning 360 virtual tours on Cloudpano.com. Thank you for choosing us as your virtual tour software platform.