


How To Add A Floor Plan To Your Virtual Tour
In this post, Zach Calhoon, co-founder of CloudPano.com will show you how to use a new feature that lets you add a floor plan to your 360 virtual tours on the software platform. Click play and watch this video:
So how do you add a floor plan to your virtual tour?
- If you’re brand new, you must first go to CloudPano.com and click Get Started To Sign-in to take you over to the app.
- If you don’t have any photos or 360 images to add to our platform yet, you can just play around with our sample tours.
- To use the floor plan feature, and click on the icon at the right side that says Floor Plan. Then press the button that says Add Floor Plan.
- It will take you to a screen that says Upload Floor Flan Image. Click on the Browse button to upload a 2D blueprint floor plan and then name it. You can also add more floor plans if you want to.
- Click on the floor plan that you want to use and it will open up a screen that says Link A Scene.
- Select the area where you want to link a scene by clicking on it. A small screen will pop-up that says Select Room to Link, where you can select the photo that you want to use.
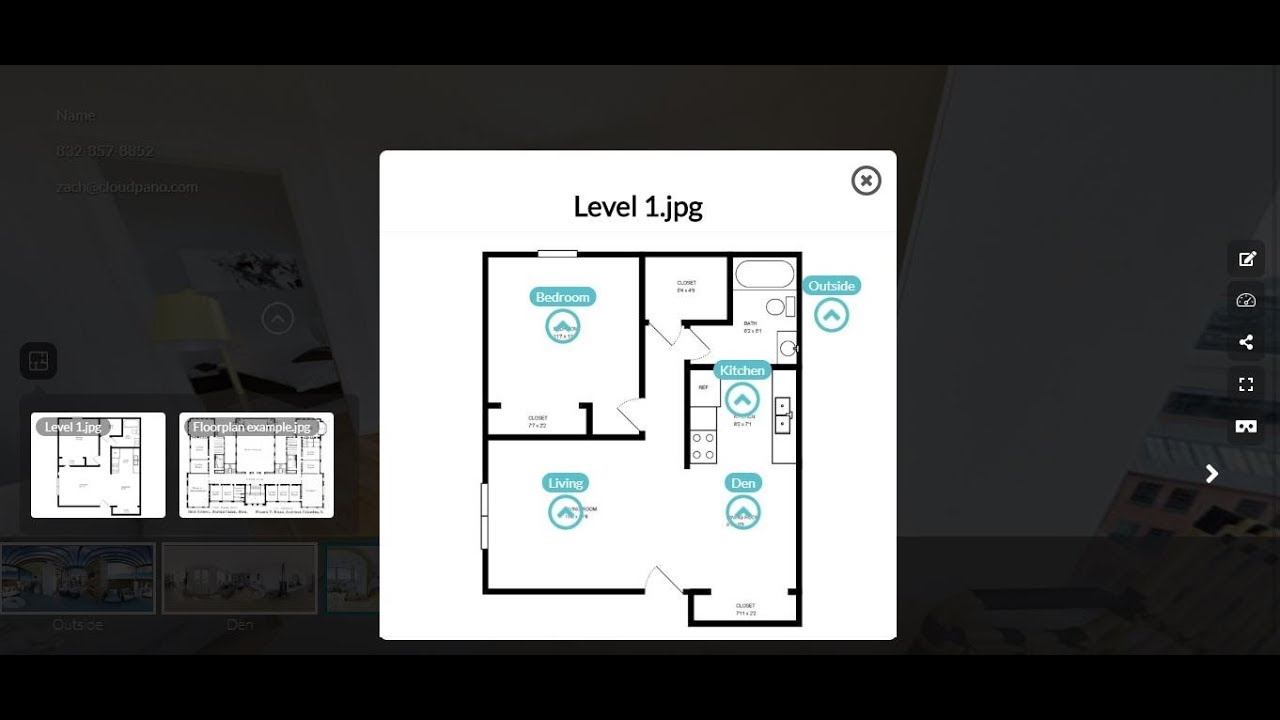
- After selecting a photo, click Save. This will create a small hotspot on that floor plan. You can add more hotspots to the other areas of the floor plan by following the same process.
- Once you’re done adding all the hotspots, exit out of the screen and hit Publish to see your virtual tour. It will open up a screen that gives you a link to the virtual tour that you can give out to your clients.
- On your virtual tour, you will see the floor plan icon that you can click to access the floor plan that you just created.
Using the Floor Plans feature is a new way to quickly navigate through your virtual tour. It provides your client with an elegant way to explore a home they are shopping for or looking to possibly rent. It’s just another feature that you can add to your CloudPano.com and virtual tour business repertoire.
Become a Pro Plus user today and start adding floor plans into all your virtual tours!
To get started, go to app.cloudpano.com, hit the Pro Plus button, and click Add to Cart.