


[*Feature Update*] How to take 360 and 2D Screen Shots For Editing On Your Virtual Tours
[*Feature Update*] How to take 360 and 2D Screen Shots For Editing On Your Virtual Tours
Hello everyone,
My name is Zach Calhoun and I am from CloudPano.com. I hope you’re having a great day. I have a new feature to share with you today that I think is really cool and will help you get even more value out of our 360 virtual tour platform.
For those of you who may not be familiar with us, we are the world’s best 360 virtual tour platform. We allow users to create interactive and immersive media using 360 technology. We have been featured by major brands such as Realtor.com and Zillow, and we invite you to join our community and test out all of our fun features.
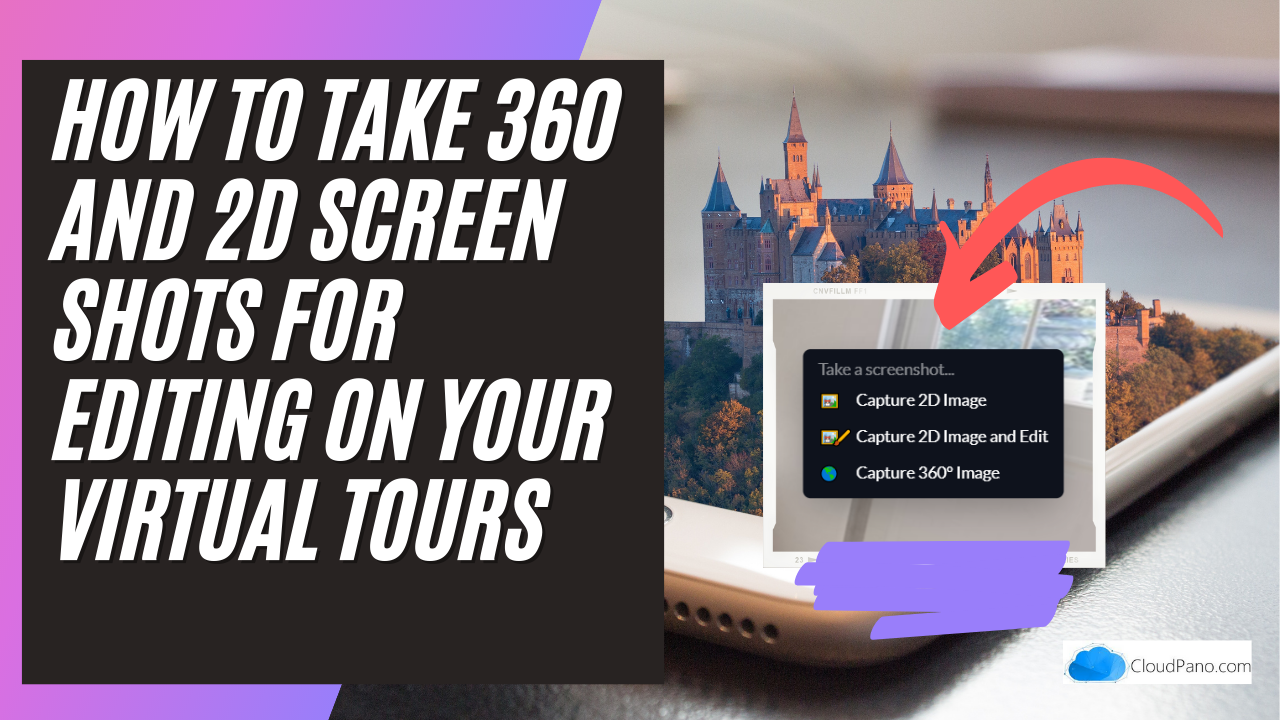
So, let’s take a look at this new feature in the CloudPano editor. When you right-click on a scene, you will see three options: capture 2D image, capture 2D image and edit, and capture 360 images.
The captured 2D image option allows you to take a screenshot of whatever you’re currently looking at in the tour. This can be useful for adding images to other places or using them for collaboration purposes.
The capture 2D image and edit option also allows you to take a screenshot, but it opens up an editor where you can draw on the image, create straight lines, and change the color. This can be useful for highlighting certain features or areas in the tour.
Finally, the capture 360 image option allows you to capture the full 360 degree view of the current scene. This can be useful for creating immersive experiences or for sharing the full tour with others.
I hope you find this new feature helpful and that it enhances your experience on CloudPano. Thank you for joining me today, and don’t forget to check out all of our other features on the platform.